Sunday, April 26, 2015

New skills falling like rain today...

It is only Sunday morning but I've already learned a lot this weekend. Yesterday I learned to mow the "lawn". That was a first. I made it into my 40s without ever having mowed grass. That is because I've largely lived places where I think it is criminal to have lawns. Nevada. New Mexico. Colorado. Not that there is anything wrong with grass. I just don't understand pouring drinking water on a plant that is meant for climates with rain.

This house/studio is a rental and the instructions from the landlords were literally, "just don't let the grass die completely--the city will cite us." So keeping grass healthy apparently involves cutting it from time to time. We hired the neighbor boy to cut it last year, but finally realized that the $17.50 we were paying him every week would quickly pay for a mower (and was more than we made in an hour which just seemed wrong as he is eleven). This pathetic little patch is under some big pine trees so it hardly grows as it gets no sun. A push mower seemed the thing, and one was found at the big orange box store.

We spent Friday evening cruising the lawn mower aisle with a lot of youngish men debating the benefits of this or that power mower. We brushed past a little clot of them surrounding a riding mower and slunk down to the end of the aisle where there were a couple forlorn push mowers. Yep. The ones without power. After about 20 minutes of asking ourselves whether we really needed the ones that make a lot of noise, we bought the best push mower, because if Fiskars makes great sewing scissors, certainly they could make blades that cut grass.

I put it together yesterday morning and 20 minutes later had a nicely shorn "lawn" and stronger biceps.

Learning is good. I learn a great deal from my students. Honestly one of the biggest reasons to teach is that you learn so much. I bet I learn more than they do most days.

I learned a new computer program for presentations after the lawn thing yesterday. Watch out! My videos and classroom presentations are about to become EPIC much better. Last week I learned how to put drop shadows on my tapestry photos. Also very thrilling.

Note to self: One step at a time is how it is done. one. step. at. a. time.

Today is a day for paperwork. The Color Gradation for Tapestry presentation needs some tweaking for the class I teach starting Thursday in Golden, CO. I've wanted to fix it up for years. It was never bad, mind you... just didn't quite give them that whole picture view I want at the beginning of the class. This week is the week... hopefully the guinea pigs students will love it.

(Still spots! There are still many spots open. Come join us! The Recycled Lamb. Yep. That is desperation speaking.)

Oh, and it is actually raining! It is suppose to rain all day. You have no idea how glorious it is to get rain in the desert. My apologies to California.

Tuesday, April 21, 2015

Weaving color gradations with tapestry... or fun with a copy machine

I'm working on some new sample tapestries for a class I'm teaching in June in Michigan. The class is called Predicting the Unpredictable: Color in Tapestry and it is a color theory for tapestry class. I think I called it that so I would have to learn to spell unpredictible. See there, I still got it wrong. One I, one A. Unpredictable. (As in my spelling is...)

Yesterday I pulled this one off the loom.
The top half is a photocopy of the weaving on the bottom. I was attempting to match the values in the grayscale with the colors and I'd say it came out pretty close. I didn't pay any attention to the hues of the colors on the bottom, only to the values (though I'm sure I don't have a yellow that would match the darkest three hues).

I am going to do this again. I am also going to dye a different gradation of blacks. This one has a large jump between depth of shades 0.26 and 1.0. See it right in the middle? I am using a dye scale by Ginny Phillips but I think for this one I might just go back to the scale James Koehler taught me which is based on a different geometric progression. I'll certainly show you how it turns out. I think the value gradation in the photocopy (top left) is better than the woven grayscale (top right)!

This is woven with Harrisville Highland which is a two-ply yarn. I will also do it with the singles yarn I use for my tapestries to illustrate the difference between just two and three plys.
I'm also getting ready for another round of Color Gradation Techniques for Tapestry, April 30 - May 3 in Golden, Colorado. I'm really excited about this class. Not only do I have some new ideas to try in the area of color theory and using gradation in real weaving applications, but the class is super small and full of great people I have met various places over the last few years. We really do need a couple more people in the class, so if you have any inclination to spend four days with me in sunny Golden, let me know! Information on The Recycled Lamb where the class is being held is here: http://www.recycledlamb.com/events.php
And a little more information on my website here: http://www.rebeccamezoff.com/workshops

Here are some of the yarns for the class, all packed up now and ready to go!

Friday, April 17, 2015

My favorite tapestry technique

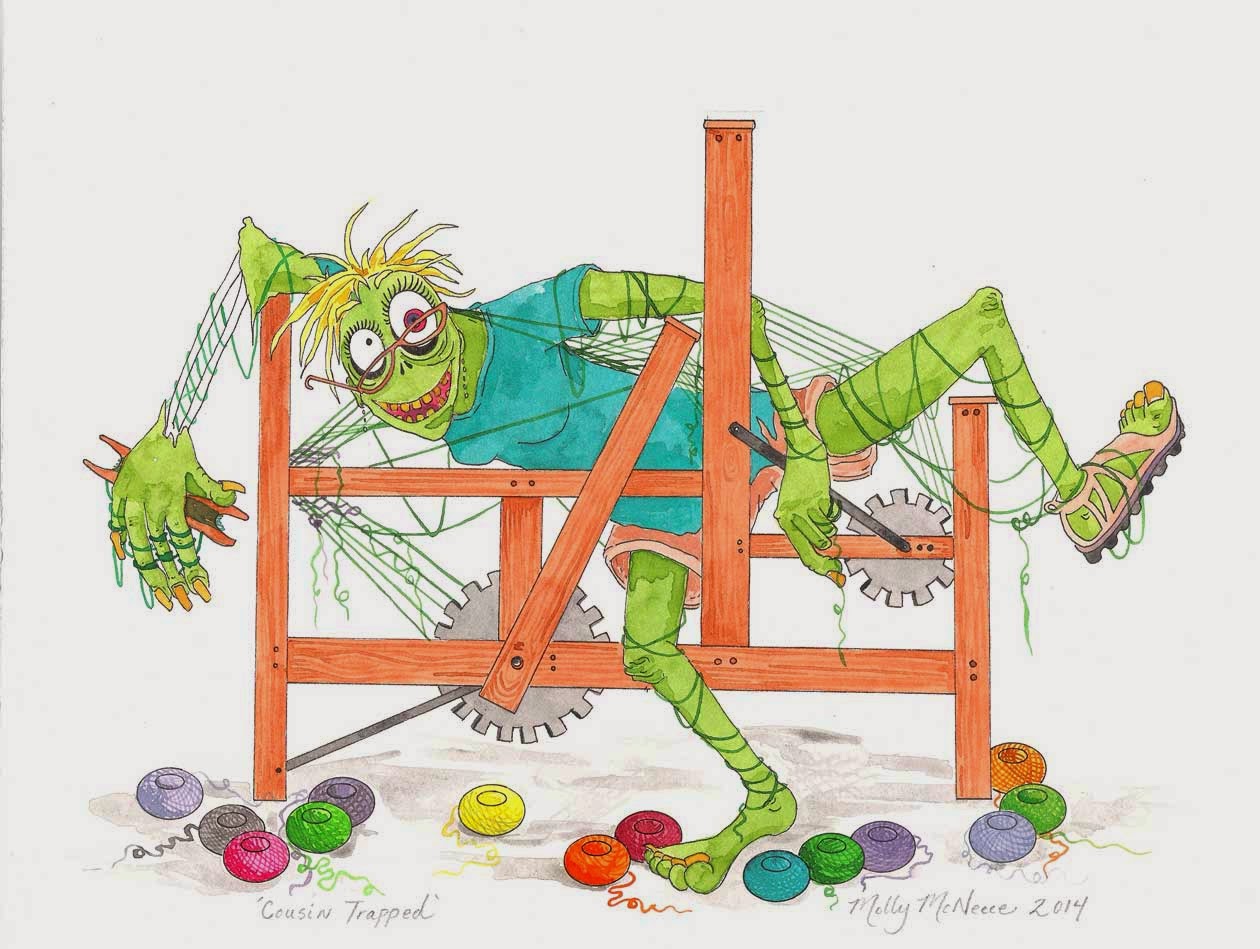
If you've been paying attention, you may have noticed that I teach a lot of things about tapestry. There are times when I want to weave something insanely complicated. If I actually let this wish get the better of me, I might end up feeling like this.
Molly McNeece, Cousin Trapped, watercolor
When this happens, I go back to some old tried and true tricks. My favorite is regular hatching. If you've had a class from me, you've probably tried this technique. I used it in the spirals in many of my Emergence pieces and sometimes I just weave it on a sampler to calm down a little bit, dork dedicated practitioner that I am.
Rebecca Mezoff, Emergence VII, 45 x 45 inches, hand-dyed wool tapestry. All of the spiral form not in the teal bar is done with regular hatching.
There are a couple ways you can do this technique. The simplest is just to overlap two colors in full sequences in a regular manner.

Use two colors and change the points where they relay according to your cartoon or any regular pattern. The example below creates a triangle.

Depending on the two colors used and their values, you may create the illusion of a third color between the two as in this arrow pattern which seems to suggest a green tree.
An excellent example of this technique is in Ulrikka Mokdad's tapestry, Floating in Blissful Ignorance.
Ulrikka Mokdad, Floating in Blissful Ignorance, 50 x 33 inches, wool weft, linen warp, photo: Frantz Henriksen
This detail shows the regular hatching between the peach and the black in the finger.
Ulrikka Mokdad, Floating in Blissful Ignorance, Detail
This technique can also be done with a separate color used for the striped lines independent of the background color.

Rebecca Mezoff is a tapestry artist and educator who loves to scratch puppies behind their ears, eat pepperoni pizza, hike long trails, and teach people about tapestry weaving. You can find out more about her and her online classes here: http://www.rebeccamezoff.com/online-learning/

Note: This blog post first appeared on the Mirrix blog as a guest post. If you feel like you've read it before, you're not crazy (well, not that I can tell anyway), you did. 

Monday, April 13, 2015

A conversation about Rebecca Mezoff's tapestry with Fiber Art Now. See the webinar replay.

What a fun thing it is to participate in a conversation in webinar format. If you missed my webinar with Fiber Art Now's FANFare yesterday, the replay can be found HERE (or watch in the viewer below).
I have always been a very introverted person, but my 17 years of practice as an occupational therapist forced me to learn to interact with other people quickly and to think on my feet. This is the kind of challenge that made this webinar fun to do. The live format is great and of course we always wish for more time for questions! I certainly can't think of my questions that quickly, so if you have them, put them in the comments below or contact me and maybe I'll do a blog post about it.

As you watch it, here are more images and some further explanation about things I was talking about.

The most important part of the webinar for me was the last third where I was talking about the importance of learning and my philosophy about teaching tapestry. Teaching tapestry in a way that is accessible to people in many different life situations is important to me. Expanding the reach of tapestry in the world both as an art medium and as something that is just fun to make is what it is all about for me.

Here are some more details from the webinar:
I talked some about the Reno Fiber Guild (and I am eternally grateful to these wonderful people) and how I started trying to make images in doubleweave which led me to tapestry. This was the kind of thing I was making just before I returned to New Mexico to study Rio Grande weaving at Northern New Mexico Community College in El Rito, NM.

This was my studio in El Rito, the outside and the inside.
My studio in El Rito, NM. 2004-2007
The walls of that studio were five foot thick adobe. It was heated with a woodstove and since I didn't keep the stove lit all the time, it was freezing in there all winter. Still, the light was great from some huge skylights and I wove many things there at the same time I was taking some classes with James Koehler. I would eventually drop out of the Rio Grande program and became James Koehler's apprentice in Santa Fe.

Here are some images of Northern New Mexico Community College in El Rito. They no longer have the Fiber Arts degree program there, but you can take a continuing education class from Karen Martinez who was my instructor if you are interested. She is an amazing artist.
The first "tapestry" I ever wove on one of the walking looms at NNMCC, 2004. It is now a runner in front of my loom and you might spot it in the webinar replay.
This is an example of some of the first tapestry weavings I did.
I talked about the spiral motif in the Emergence series of tapestries. I lived on Mesa Prieta. It is completely covered with black basalt boulders and a great percentage of those rocks are covered with petroglyphs covering a couple thousand year span of time. The spiral images in my work came from the experience of living on that mesa and hunting the glyphs every day on my walks.
My niece Megan with one of the most spectacular petroglyphs on the mesa. This one was about 50 yards from my house.
The strawbale house on Mesa Prieta.
Coming down the mesa after a petroglyph-searching hike. The road turns to rutted dirt just past this point.
One of the spirals on the mesa. Overlooking the Rio Grande River when the cottonwoods were changing.
If you are interested in the petroglyphs, my landlady, Katherine Wells is the person who has spent much of the last couple decades of her life making sure these amazing petroglyphs are preserved. You can find out more about the place and perhaps schedule a visit HERE.

If you are interested in seeing more about my dyeing, this YouTube video shows some of the process. (Hint: If you push the YouTube button in the bottom right of the player, you'll be taken to YouTube to view. If you get these blog posts in an email, you have to visit my blog online to see videos: http://rebeccamezoff.blogspot.com/)
I mentioned my teacher James Koehler. He does still have an artist page on the American Tapestry Alliance's website. This is an example of his work.
James Koehler, Harmonic Oscillations LXIII
Cornelia Theimer Gardella, James Koehler, and myself at the opening of our show, Interwoven Traditions: New Mexico and Bauhaus show in Erfurt, Germany, September 2010.
Rebecca Mezoff, Barn Burned Down, 5 x 17 inches
I talked about this tapestry and the inspiration from the old barn in the Austrian alps. What I didn't really say in the webinar was how much stories have a part in my design. This one glimpse of light through the slats of a barn created a whole story in my head about light and fire and things disappearing and making way for new things. This piece and another reference the haiku below.
I talked a little bit here about the show I did in Germany with James Koehler and Cornelia Theimer Gardella. The photo above of the three of us was taken at that opening. THIS blog post has more about that experience.

The discussion about representative tapestry versus abstract work both in my work and in tapestry historically is always interesting to me (and perhaps no one else!). I gave the example of this piece being one of the most representative tapestries I've done.
Rebecca Mezoff, Cherry Lake, 8 x 13 inches
... and clearly if you don't know the story you wouldn't know what this was. I took a hike to a lake called Cherry Lake in southern Colorado and the blue became the lake and sky and the pick and pick pattern the aspen trees that were changing colors. Many of them were red that year which is unusual.

As I was talking about the American Tapestry Alliance, I mentioned Mary Lane (an indispensable part of the organization!) in response to Cami's statement about their Facebook tapestry of the day. And I noticed fleetingly that someone noted who actually does this for ATA. I missed who that was, but please put it in the comments below for me!

Partway through we had a few technical difficulties and Victoria had up the Kasala Gallery page. I didn't think quickly enough to comment on this, but it is my new gallery in Crested Butte, CO.

Cami mentioned my newsletter. You can sign up HERE.
I referenced my YouTube channel which has many videos about tapestry. I was talking about how much better my video-making abilities have gotten. That is true... and more to learn every day.

Leave comments below or contact me with what was interesting to you about this webinar. I'd love to have your input and help in growing the community of tapestry artist/weavers all over the world.

Friday, April 10, 2015

Have questions about running a tapestry studio?

Fiber Art Now has a monthly webinar program where they interview artists called FANFare. I'm their artist this Sunday, April 12th at 3pm EST. You'll be able to ask questions during the live broadcast.

I have greatly enjoyed past episodes and am looking forward to participating in my own show. We'll talk about my creative process, tapestry production in general, and the joys and challengings of running a small fiber-based business.
I'm off to clean my studio a bit so you can actually see the work in progress! Please join me Sunday if you can.

You can register here (it is free): http://fiberartnow.net/fiberartfanfare/#.VSfnaWYgrW4
And if you miss the episode, go to that link and you can watch the replay.


Thursday, April 9, 2015

Really old tapestries... reproductive mural tapestries and making art today

In February I was able to attend a Textile Talk at the Denver Art Museum with conservator Alison McCloskey and her team. They were working on stabilizing two large tapestries for the upcoming tapestry show which opens in June 2015. The smaller of the two pieces was a Flemish tapestry called The Birth of the Prince of Peace which had a wool warp and wool and silk weft. It was from the early 16th century which makes this piece 500 years old.
The Birth of the Prince of Peace, Flemish 16th century tapestry
I really enjoyed hearing about how they stabilize these textiles. The goal for them is to keep the integrity of the textile as much as possible. There are many old repairs which are visible in the photos, most of which they aren't redoing. All of the rough stitching you see was probably repairs made hundreds of years after the initial weaving. There are spots where a repair weft was put in that is a markedly different color than the surrounding tapestry. Probably they matched at one point, but the fiber faded differently.
The conservator who was working on this piece (who's name I did not write down unfortunately!) was using DMC embroidery floss to do some of the twined stabilization.
You can see the twined stitch they are using for stabilization in this close-up of an 18th century Spanish table cover they are also restoring for the exhibit.
And of course I took a few photos for use as illustrations of hachure use in medieval textiles.
The other piece we looked at was a 9 by 20 foot tapestry called The Peasant's Feast, also Flemish. This is a photograph of what the whole tapestry looks like.
And this is what we saw of it.
And a detail from the back which was rolled around the tube.
Alison talked about how they will get this huge and very heavy tapestry up on the wall without damaging it. It involves two lifts and a platform with the tapestry accordian folded on top. It will be raised to the top, attached to the hanging system, and then the two lifts will be lowered simultaneously allowing the tapestry to unfold. I was happy to hear that they use a similar hanging system to mine--twill tape and velcro.

The information about the upcoming tapestry show is not on the Denver Art Museum's website yet, but it will be soon. The show opens in June and will run for most of a year. It will include these historic tapestries as well as many examples of contemporary tapestry from their collection.

All this discussion of medieval tapestries brought me back to the conversation I had recently with Archie Brennan as I was writing my article for the Spring 2015 issue of Fiber Art Now.** Archie talked both to me and in many talks and articles you can find if you dig a little about how tapestry became a reproductive medium in the middle ages. That means that weavers were trained to copy a painting in thread. This brought tapestry weaving away from the lovely improvisational work we see in the Coptic tapestry fragments to something that was stiffer and less creative from the weaver's perspective. Of course those weavers were and are incredibly skilled. But somewhere in that practice of copying paintings, tapestry lost its ability to be an art medium in its own right. It is my opinion that we need to regain the standing of the work of the artist/weaver as an art form before tapestry can even hope to become recognized as more than a "decorative art" or craft.

And of course I also got to see the chief blanket piece of James Koehler which will be in the tapestry show. I wrote more about that on this blog post:
A Chief Blanket-inspired Tapestry of James Koehler at the Denver Art Museum
James Koehler, Chief Blanket with Blocks, in the collection of the Denver Art Museum
** The article in Fiber Art Now is called Susan Martin Maffei & Archie Brennan: Tapestry Partners and Innovators. It is in the Spring 2015 issue which is just coming out now. With another huge thank you to Archie and Susan for their generous donation of time and resources to the article. I learned so much from both of them.

Tuesday, April 7, 2015

Which online tapestry class is right for me?

The world of tapestry is exciting. There are many great teachers out there and lots of choices.

There aren't so many choices thus far in online learning however. If you are considering one of my beginning online tapestry courses, this decision tree may help answer some of those questions for you. And as always, contact me for more clarification.

The Self-Directed, Part 1, and All-Three-In-One are all versions of my beginning tapestry techniques course, Warp and Weft: Learning the Structure of Tapestry. Intro to Tapestry and The Mobile Tapestry Weaver are currently only offered as in-person classes but they will be online before too long.
If you click the image, it will open in an even bigger window which is easier to read.
This graph only applies to my beginning classes. I will be opening my Color Gradation Techniques for Tapestry class online in August of 2015 and for that you should have some experience with tapestry weaving (for instance, have taken my Warp and Weft class).

I want to put in a little plug here for the Self-Directed version of this course. If you are the kind of person who loves online classes that don't have direct teacher interaction, this version might be just perfect for you. You do miss out on the interaction with fellow students and feedback from me, but that isn't necessary for everyone. And now that my classes are any-time access, you can start the Self-Directed class on the same day you register. No waiting.

The next set of Warp and Weft classes that are timed start May 11th. Registration is open now with videos and PDFs you have access to right away to help with materials and tools. See this page of my website for registration links, reviews, and pricing.
http://www.rebeccamezoff.com/online-learning/

Sunday, April 5, 2015

Spinning yarn for tapestry

My second spinning class with Maggie Casey** ended this past week. I have had more fun messing around with my spinning wheel than I thought possible. I love it enough I wouldn't miss a class for two blizzards, a long-scheduled workshop I was teaching, or for car troubles. I made it to all ten classes.

The thing is, it isn't just about the spinning. I have a long way to go to become a good spinner. I realized a few weeks in that I could MAKE YARN! The tools were right in front of me. I can combine fiber in so many ways to make exactly the yarn I want to use in my tapestry. This was a revelation.

For the last class we had to design a project. Mine will be a small piece on a Hokett loom... but with handspun. I figure I can manage to spin enough even yarn to weave a 2 inch square tapestry, right? Even if it takes half a pound of fiber. I'm on a pick and pick kick lately (some of you refer to that perhaps more correctly as half-pass) and have some new ideas related to color blending in spinning. Since I already know how to dye and a friend loaned me a drum carder, I think the options are pretty much endless. I'm just missing a set of those English combs.

Here is a little of what we did this week playing with various fibers. Maggie started us out with silk. It was good thinking on her part. Who doesn't love silk? We started with a cap. It was fascinating to hear the story of the Bombyx Mori and how silk is produced. There is a website called Worm Spit that details the way these silk moths are raised. What I didn't realize is that silk moths are domesticated. They have been so changed by cultivation that they couldn't live on their own.
Maggie separating the silk cap into layers. Each layer is one cocoon.

Silk cap. You can also buy it in "hankies"
Maggie and Kathy pull a layer of the cap off.

The silk in this preparation was not hard to spin. It wasn't even, but the staple is impossibly long, so even though I still have little control sometimes, it wasn't going to break on me.

Then we moved on to some Tussah silk. This had been cut and combed and it was fast! It seemed very hard for my beginning spinning skills. But it was lovely.
Tussah Silk
And here is what the cocoon looks like. The sticky sericin that holds it together is removed in hot water and then the cocoons are unwound onto a reel. There is a mile of silk on one cocoon.
Silk worm cocoon
Then we tried some camel mixed with silk. This went okay. The camel gave the silk a little more bite and I had an easier time spinning it.
50/50 Camel/Silk
All of that silk fiber was lovely. When we were sufficiently lulled by the mysteries of silk and how it is made and processed, Maggie pulled out the next fiber. It couldn't have been more different.
Presenting:
Linen.

The story is still good. Flax preparation involves rotting (rhetting) the fibers and lots of abuse including the use of a medieval torture instrument, the hackle. There is an article about linen in the Twist issue of Ply magazine that talks about this abuse in great detail... in such detail that you really start to feel sorry for the plant. But then she comes back and becomes a better fiber the more abuse you give her.

This fiber did not run away from me. The staple is very long and the fibers very thick. I doubt I'll ever spin linen again, but once I got over the fact that it isn't silk, I enjoyed it.

spinning linen (flax)-- Look at me spinning with a long draw!
Then there was the cotton. What can I say about cotton except I hope never to spin it again. Maggie started out by telling us we needed to spin it long draw. Now I have had just a tiny bit of success even making the long draw method work for me, so this seemed like a tall order.

The staple is exceedingly short and I couldn't manage it. We started with some lovely processed cotton which I was mildly successful with. At least it held together long enough to wind onto the wheel.
Carded cotton
And then with a little chuckle, she handed us this.
cotton bolls
Spinning from the boll. I did it for about 2.7 seconds and then it all fell apart and I couldn't pull myself it back together. Eventually I started futzing with my wheel and hoping we'd move onto something else fast.

To make up for that misery, she ended on a Merino/Silk blend. It was absolutely lovely and I will be buying more of this fiber when my skills improve a little bit. I was able to manage the fiber nicely and my resulting bit of yarn looks pretty good!
Merino/silk blend
These spinning classes have really opened my eyes to the world of different fibers. I have to admit that I started weaving tapestry with the yarn my tapestry teacher used and haven't stopped yet. I have tried many different yarns and found others that I like quite a lot (as well as many I do not). But I didn't start to understand the subtlety of yarn until now. Not only do I now have many more options of how to blend color and make different color effects, but I have a much better understanding of important concepts like staple length, fiber content, and fiber care/cleaning.

When you look at yarn labels, generally you just see the stuff called WOOL. But there are so many different kinds of sheep and they have such different characteristics. It is a fascinating magical black hole that I have fallen down.

I'll be experimenting with the drum carder and some ways of making tapestry yarns next. I don't expect great things from my ability to make an even yarn, but hopefully I can make something consistent enough to test on the loom... at least on a little lap loom.

When does the next class start Maggie?
Production of silk kills the silkworm. In Korea, they make use of those worms too! Snack food.

**Maggie Casey is a celebrated spinning teacher and co-owner of Shuttles, Spindles, and Skeins in Boulder, CO. She teaches workshops all over the country though I recommend coming to Colorado. She is the author of Start Spinning: Everything you need to know to make great yarn.